Training

THE ULTIMATE GUIDE TO FIXING A ROCK CHIP

When you fix a damaged windshield, your customer is safer. Few know that the windshield is one of the strongest parts of the vehicle and a main contributor to driver safety in an accident. It’s also very easy to fix when the damage is small.

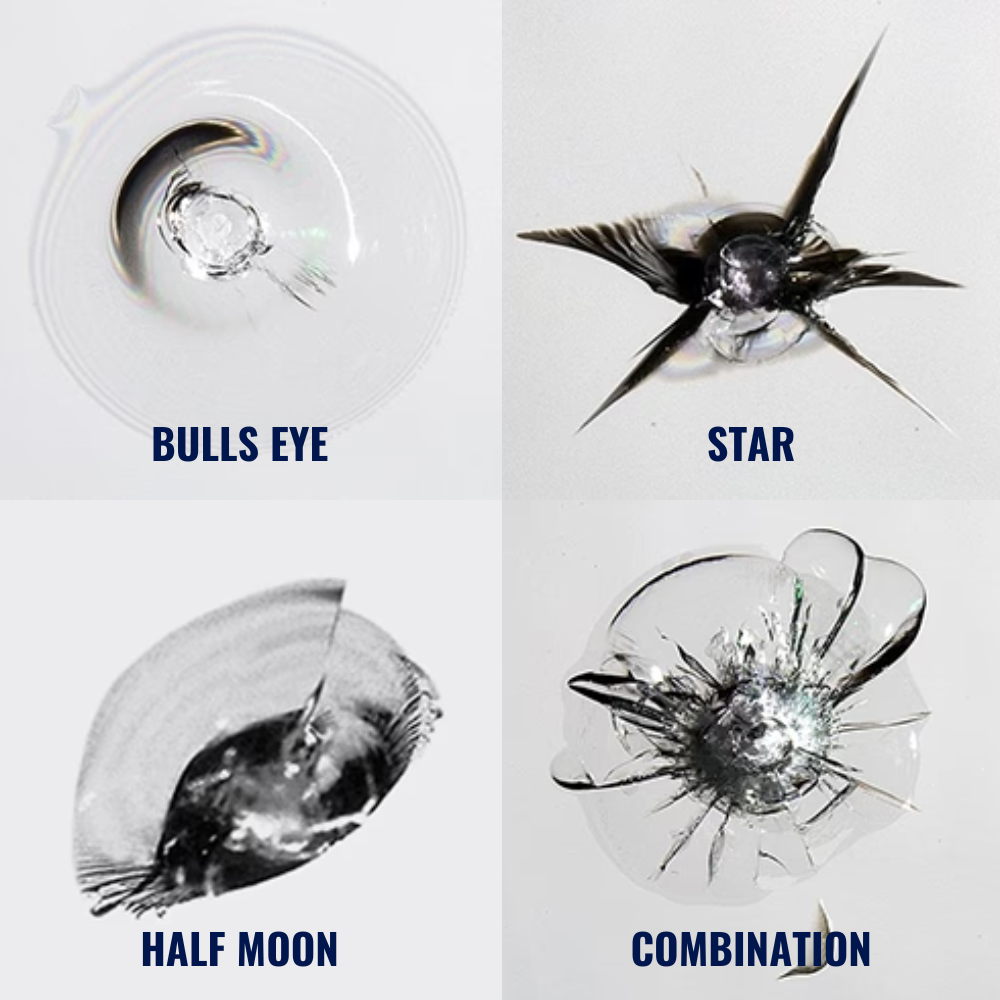
WHAT YOU NEED TO KNOW ABOUT ROCK CHIPS

  • BULL EYE
  • STAR
  • HALF MOON
  • COMBINATION

Nearly all insurance companies are happy to pay for rock chip repairs in an effort to save money later. It’s cheaper to fix a chip than to replace a windshield. If the repair is smaller than a dollar bill, it can be covered by insurance. If you're using our insurance processing services for windshield repair, simply send us the invoice and we will process the claim. For each type of damage the process is nearly the same.

WHAT YOU NEED TO KNOW ABOUT WINDSHIELDS
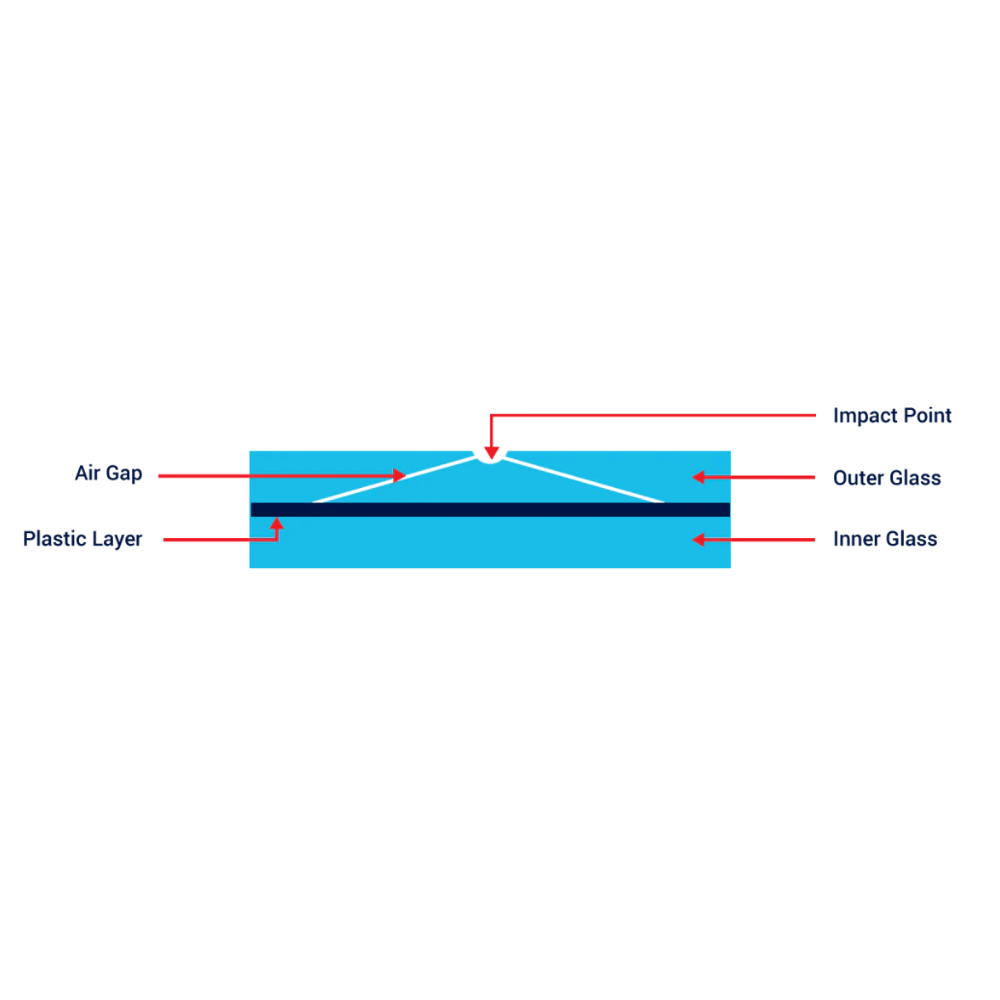
Windshields are made of 3 layers (see image to the right). There are two layers of glass (inner and outer), held together by a sticky plastic layer. This way, in the event of a wreck or windshield damage, a windshield doesn’t shatter, making it safer for drivers. When an object hits the windshield, it shatters through the outer glass, creating a break - or an air gap. Substances and weather changes easily expand and contract within the air gap, causing it to crack further. Repairing the windshield prevents the cracks from spreading and damaging the entire windshield. 

PERFORMING A WINDSHIELD REPAIR

Step 1

Clear out the center of the chip.

The purpose of this step is to open up the impact point to allow resin to enter into the various parts of the chip. There are two options to clear the center of a chip.
  • Option 1: Use a pick (small pointed device). Most chips will fill by simply picking out the impact point with a pick. We recommend doing this first, and using option 2 (drill) as a backup for more difficult repairs.
  • Option 2: Use a rock chip repair drill. The purpose of the drill is to clear out the chip, not to drill through the glass. This means let the drill do the work and don’t force it. To drill, simply place your hands firmly on the windshield with the drill cradled in both hands (see image to the right). Start by drilling the center of the chip at an angle, then quickly adjust so the drill is standing upright (see image to the right). Let the weight of the drill and the drill itself do the work. Stop when the drill is no longer progressing or when you pop through the first layer of the windshield.
  • Purpose:
  • Drilling opens up the chip so the liquid resin can fill all the cracks.
  • NOTES:
  • Drill bits will last 6-8 uses, then will need to be replaced. You’ll notice it becoming less effective.
  • FEAR:
  • Drilling through the windshield. For most of us, this is the scariest part of the repair during our training. Don’t worry, it’s nearly impossible to drill through the windshield. In the improbable event that it does happen, simply repair the inside just as you would the outside. The repair will be equally as strong.

Step 2

Place the bridge over the chip.

After wiping the area with a cloth and blowing out the drilled area, place the bridge over the chip. Make sure both sides of the bridge are unscrewed so the suction is the first part of the bridge to touch the windshield. Once you have lined up the chamber (the screw like object on the right side of the bridge in the picture to the right) over the hole where you drilled, firmly press down the bridge and clamp down the suction. The bridge should now be stable. Next, screw down the balance pin (the screw like object on the left side of the image) until it touches the windshield. Screw down ½ turn further. Now screw down the piston in the same way, screwing a ½ turn further than when it touches the windshield.

Step 3

Inject resin into the chip.

Remove the piston (the screw like object inside the chamber), keeping the chamber secure against the glass. Drop 4-5 drops of resin into the chamber (for large breaks, add a few more drops as needed).

ext, slowly tighten the piston to begin injecting resin. When you start to feel pressure or see resin coming out of the bottom of the chamber, stop. Let the pressure slowly push resin into the cracks. If it appears to have stopped progressing, slowly loosen the piston ½ turn. This will pull out some of the air in the chip. Then tighten the screw back to where it was and a ½ turn more. Repeat this process until the chip is filled.
  • TIP:
  • Be patient. Injecting resin doesn’t happen immediately. Look at the crack lines and you’ll see it’s working, even with very little pressure. It can take 30 seconds to a minute for the resin to fill.
  • TIP:
  • Use a lighter. If the resin doesn’t seem to be progressing, apply a lighter underneath the chip (inside the car) for a few seconds, any more and you may melt the plastic layer in the middle. This will heat the resin and the air, allowing the resin to fill the chip a bit easier.
  • TIP:
  • The o-rings (on the piston) and the end seal (on the chamber) will last between 30 and 40 uses. Look for signs of wear and tear like cracking and stretching.

Step 4

Remove the bridge.

Lay a cloth over the piston (to avoid spray when the seal pops). Release the seal by unclamping the suction. Use your fingernails to lift the suction and pull the bridge off. Do not unscrew the piston or the pressure will pull the resin out. Then, using a cloth, wipe down any excess resin.

Step 5

Fill the pit.

After the chip is filled, a little hole from the drill, called the pit, will remain. Using the pit sealer, fill the hole with a tiny drop. Lay a curing film square over the top of the drop, and gently press down with a finger to flatten the pit sealer, ensuring that there are no air bubbles under the plastic curing square.

Step 6

Cure the resin.

  • Now place the UV light over the chipped area. Let sit for 2 minutes or until resin is hard. Remove the curing square.

Step 7

Create a smooth surface.

  • With a razor blade, scrape the surface of the windshield to remove excess resin. The razor blade should not be at an angle, but straight up and down to avoid scraping out the pit. Scrape back and forth rapidly, changing directions, until the surface is smooth.

Repair Complete!